Electrical Troubleshooting
Table of Contents
- Introduction
- Understanding Home Electrical Systems
- Safety First: Precautions Before Troubleshooting
- Troubleshooting Common Electrical Problems
- Advanced Troubleshooting Techniques
- When to Call a Professional Electrician
- Preventive Measures to Avoid Electrical Problems
- Conclusion
- FAQs
Introduction
For many homeowners, the electrical system is a vital yet often intimidating part of home maintenance. Electrical issues can arise unexpectedly, affecting everything from your daily convenience to your home’s safety. This is where electrical troubleshooting skills become invaluable. Being able to identify and address common electrical problems not only empowers homeowners to maintain their homes more effectively but also enhances safety and can lead to significant savings on repairs.
This article aims to demystify the process of electrical troubleshooting, providing homeowners with a comprehensive guide to diagnosing and solving the most common electrical problems encountered in residential settings. From flickering lights and dead outlets to the more perplexing issues that can trip circuit breakers, we’ll cover the essential steps and safety precautions necessary to tackle these challenges confidently.
Understanding your home’s electrical system and knowing how to respond to various issues not only equips you with valuable home maintenance skills but also contributes to creating a safer living environment. Whether you’re a seasoned DIY enthusiast or new to home ownership, this guide is designed to enhance your electrical troubleshooting knowledge, ensuring you’re prepared to address problems efficiently and safely.
Understanding Home Electrical Systems
A solid grasp of your home’s electrical system is the foundation for effectively troubleshooting issues when they arise. This system is a complex network designed to safely distribute electricity throughout your home, powering everything from the smallest appliances to the largest systems. By understanding the basic components and how they work together, homeowners can better diagnose problems and take appropriate actions. Additionally, recognizing the critical roles of circuit breakers and GFCI outlets is essential for preventing electrical issues and ensuring safety.
Basic Components of a Home Electrical System
- Service Entrance: This is where electricity enters your home from the utility company, typically through overhead or underground wires. It leads to your main service panel.
- Main Service Panel (Breaker Box): The central hub where electricity is distributed to various circuits throughout your home. It houses circuit breakers or fuses that shut off power to specific circuits if an overload is detected.
- Circuits: Your home is divided into multiple circuits, each designed to supply electricity to specific areas or types of appliances. Each circuit is protected by a circuit breaker or fuse in the main service panel.
- Outlets and Switches: Outlets provide power to plug-in devices, while switches control the power flow to lighting fixtures and possibly other devices.
The Role of Circuit Breakers and GFCI Outlets in Preventing Electrical Issues
- Circuit Breakers: These devices are designed to automatically shut off electrical power to a circuit when it becomes overloaded or short-circuited, preventing wires from overheating and potentially causing a fire. Understanding how to reset a tripped circuit breaker is a fundamental troubleshooting skill.
- GFCI Outlets: Ground Fault Circuit Interrupter (GFCI) outlets are safety devices installed in areas where electricity and water are likely to come into contact, such as bathrooms, kitchens, and outdoor spaces. They protect against electric shock by quickly shutting off power if a ground fault is detected. Testing and resetting GFCI outlets can resolve some common electrical issues.
Video: Electrical Troubleshooting Basics
By familiarizing yourself with these components and their functions, you can begin to understand how electricity flows through your home and why certain safety mechanisms are in place. This knowledge not only aids in troubleshooting but also helps homeowners recognize when a problem might be beyond their ability to fix, indicating when it’s time to call in a professional electrician.
Safety First: Precautions Before Troubleshooting
When it comes to electrical troubleshooting in your home, safety cannot be overstated. Electricity is incredibly powerful and, if not handled correctly, can lead to serious injury or even death. Before you attempt to diagnose or fix any electrical issue, it’s crucial to take certain safety precautions to protect yourself and your home. This section outlines essential safety tips and the correct procedures for shutting off power and using testing equipment during your troubleshooting endeavors.
Essential Safety Tips and Precautions
- Never Work on Live Circuits: Always ensure the circuit you are working on is turned off at the breaker panel. This is the first and most critical step in preventing electric shock.
- Use Insulated Tools: Only use tools with insulated handles designed for electrical work. This adds an extra layer of protection against accidental electric shock.
- Wear Protective Gear: Rubber-soled shoes can help insulate your body from the ground, reducing the risk of electric shock. Additionally, consider wearing protective eyewear and gloves when working on electrical projects.
- Keep Your Work Area Dry: Water is an excellent conductor of electricity. Make sure your work area is completely dry, and never handle electrical components with wet hands.
How to Properly Shut Off Power
- Identify the Correct Circuit Breaker: Before starting your project, identify which circuit breaker controls the area where you will be working. If your breaker box is not labeled, take the time to identify and label each breaker for future reference.
- Test After Turning Off: Once you’ve switched off the circuit breaker, use a non-contact voltage tester on the wires or components you’ll be working with to ensure there is no power running to them. Never assume a circuit is dead without testing first.
Using Testing Equipment
- Non-Contact Voltage Testers: These are safe and easy to use. Simply bring the tester near the wire or component in question, and it will indicate whether there’s an electrical current present.
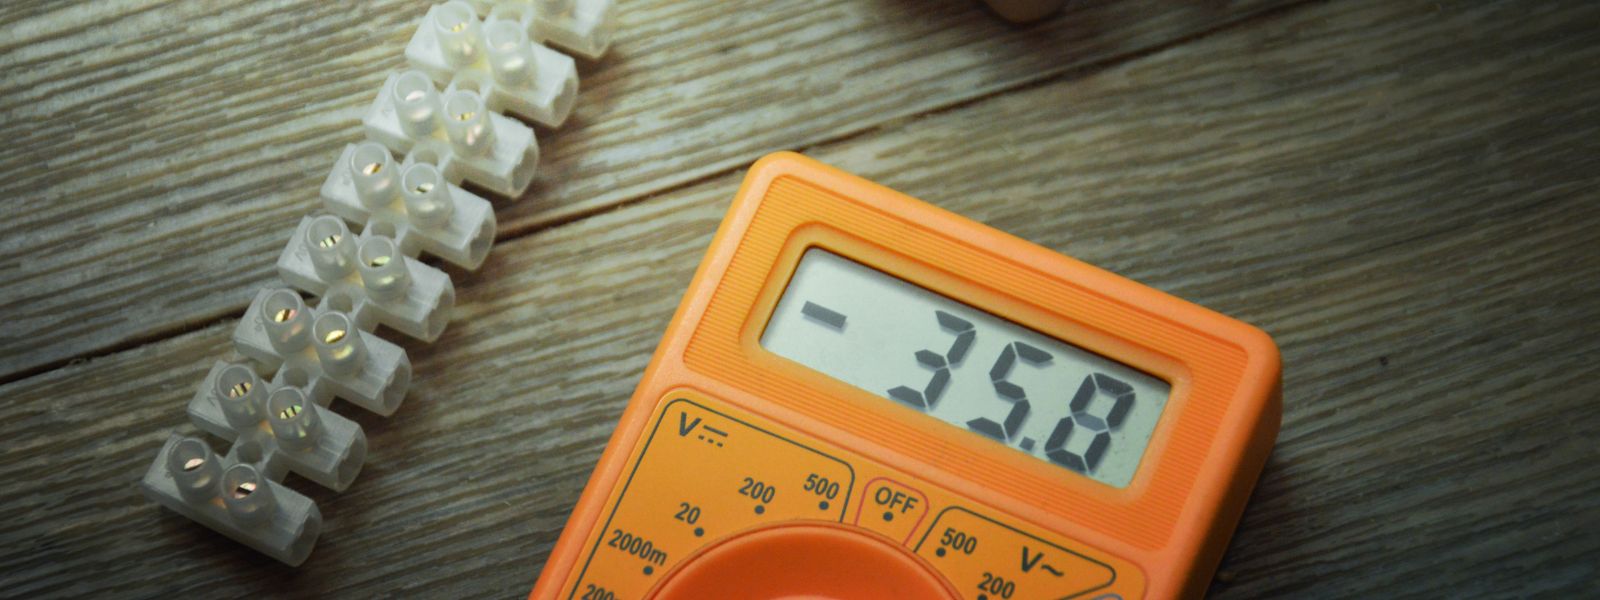
- Multimeters: More advanced than non-contact voltage testers, multimeters can measure voltage, current, and resistance. They require direct contact with the circuit but provide more detailed information. Ensure you understand how to use a multimeter safely before attempting to measure any electrical parameters.
Video: How to Use a Multimeter for Home Repairs & Troubleshooting
Table: Safety Precautions Before Troubleshooting
| Safety Precaution | Description |
| Turn Off Power | Always shut off power at the circuit breaker before starting any work |
| Use Insulated Tools | Employ tools with insulated handles to prevent electric shock |
| Wear Protective Gear | Use rubber-soled shoes and safety glasses for added protection |
| Keep Work Area Dry | Ensure the area and your hands are dry to avoid electric shock |
By adhering to these safety precautions and properly using testing equipment, you can significantly reduce the risk of accidents while troubleshooting electrical issues in your home. Remember, if you ever feel unsure or uncomfortable with a task, it’s best to err on the side of caution and consult a professional electrician. Safety should always be your top priority.
Troubleshooting Common Electrical Problems
Electrical issues in your home can range from mildly annoying to potentially hazardous. Understanding how to troubleshoot common problems can help you quickly resolve simple issues or recognize when it’s time to call in a professional. Here’s a guide to diagnosing and addressing some of the most frequent electrical problems homeowners encounter.
Flickering or Dimming Lights
- Potential Causes: Loose light bulbs, fluctuating power from large appliances on the same circuit, or more serious issues like outdated wiring.
- How to Address: Tighten bulbs and check connections. Consider moving large appliances to different circuits. If the problem persists, inspect for faulty wiring.
- When to Replace: Change bulbs if they’re the issue. Upgrade fixtures if they’re old or incompatible with your bulbs (e.g., using non-dimmable bulbs in a dimmer switch).
Dead Outlets
- Steps to Diagnose: Check if other outlets are dead, which could indicate a tripped breaker. Test the outlet with another device to rule out appliance failure.
- Testing and Resetting GFCI Outlets: Locate the GFCI outlet (usually in bathrooms, kitchens, or outdoors) and press the reset button. If outlets remain dead, check the circuit breaker or consider replacing the outlet.
Frequent Circuit Breaker Trips
- Identifying Overloads and Short Circuits: Overloads happen when too many devices are used at once. Short circuits are more serious and can be due to faulty wiring or devices.
- How to Redistribute: Unplug unnecessary devices from the circuit. If overloads continue, you may need to add new circuits to distribute the electrical load more evenly.
Buzzing Sounds or Burning Odors
- Recognizing Warning Signs: These can indicate loose connections, faulty wiring, or an overloaded circuit—all of which can be fire hazards.
- Immediate Actions: Turn off the power to the affected area at the breaker. If you can’t identify the source or if the problem persists, call a professional immediately.
Light Switches Not Working
- Diagnosing Issues: Non-functioning switches could be due to a loose connection, faulty wiring, or a bad switch.
- Simple Fixes and Replacement Techniques: Tighten wire connections or replace the switch. Always ensure the power is off before attempting repairs.
Video: How to Reset Your GFCI Outlets & Circuit Breakers
Table: Common Electrical Problems and Troubleshooting Steps
| Electrical Problem | Potential Causes | Troubleshooting Steps |
| Flickering or Dimming Lights | Loose bulbs, voltage fluctuations, outdated wiring | Tighten bulbs, check for appliance overloads, inspect wiring |
| Dead Outlets | Tripped breaker, faulty outlet, GFCI tripped | Reset breaker, test and reset GFCI, replace outlet if necessary |
| Frequent Circuit Breaker Trips | Overloaded circuit, short circuits | Unplug unnecessary devices, check for faulty appliances |
| Buzzing Sounds or Burning Odors | Loose connections, overloaded circuits | Turn off power, inspect for visible damage, call a professional |
| Light Switches Not Working | Faulty switch, wiring issues | Tighten connections, replace switch, inspect wiring |
Troubleshooting electrical problems requires a careful approach and an understanding of your home’s electrical system. While many issues can be resolved with simple fixes, always prioritize safety. If you encounter complex problems, are unsure of the cause, or feel uncomfortable making repairs, it’s best to consult a professional electrician. Their expertise can ensure that repairs are done safely and effectively, protecting your home and family.
Advanced Troubleshooting Techniques
For homeowners who have a basic understanding of electrical systems and wish to delve deeper into troubleshooting, advanced techniques can be invaluable. These methods, including the use of a multimeter and tracing circuits, require a bit more knowledge and care but can provide a clearer picture of what might be wrong with your home’s electrical system. Here’s how to employ these advanced troubleshooting techniques safely and effectively.
Using a Multimeter to Test for Voltage, Continuity, and Resistance
- Voltage Testing: To check if a circuit is live or to measure the voltage level, set your multimeter to the appropriate voltage setting. Place the probes on the terminals or wires you wish to test. A reading will indicate the presence and level of voltage.
- Continuity Testing: This test helps determine if there’s a complete path for current flow in a circuit. With the power off, set the multimeter to the continuity setting and touch the probes to either end of the circuit. A continuous beep from the multimeter indicates that the circuit is complete.
- Resistance Testing: Measuring resistance can help identify issues like broken wires or faulty components. With the circuit powered off, set the multimeter to measure resistance (ohms), and place the probes across the component or section of the circuit. A high resistance reading can indicate a problem.
Tracing Circuits to Identify Underlying Issues
- Understanding Circuit Layout: Begin by mapping out how the circuit is laid out in your home. This can involve following the path from the breaker panel to the final outlet or fixture, noting any junction boxes or switches along the way.
- Identifying Breaks or Faults: Use your multimeter to test different sections of the circuit for voltage and continuity. This can help you pinpoint where a break or fault might be occurring, such as in a specific segment of wiring or within a particular component.
Table: Advanced Troubleshooting Techniques
| Technique | Purpose | How to Use |
| Using a Multimeter | To test for voltage, continuity, and resistance | Measure at various points to diagnose issues |
| Tracing Circuits | To identify underlying wiring or connection issues | Follow the circuit path, testing as you go |
Both of these advanced troubleshooting techniques require a solid understanding of electrical principles and safety precautions. Always ensure the power is off when performing continuity or resistance tests, and be cautious when measuring live voltage. If at any point you feel unsure or the problem seems complex, it’s wise to consult a professional electrician. Their expertise can safely and efficiently resolve issues that might be beyond the scope of DIY repairs.
Video: Common Electrical Hazards and How to Fix Them
When to Call a Professional Electrician
While DIY electrical troubleshooting can be rewarding and cost-effective for minor issues, there are situations where the complexity or potential safety risks necessitate the expertise of a professional electrician. Recognizing when to call in a professional is crucial to ensuring the safety and reliability of your home’s electrical system. Additionally, knowing how to communicate effectively with an electrician can help expedite the repair process and ensure a successful outcome.
Situations That Require Professional Expertise
- Persistent Issues: If an electrical problem persists despite your troubleshooting efforts, it may indicate a deeper, more complex issue that requires professional diagnosis and repair.
- Major Installations or Upgrades: Projects such as installing new circuits, upgrading the electrical panel, or wiring for major renovations exceed the scope of DIY and require professional knowledge and tools to ensure compliance with electrical codes and safety standards.
- Signs of Wiring or System Damage: Evidence of wiring damage, such as burnt outlets, exposed wires, or a burning smell, can pose significant fire risks and should be addressed by a professional immediately.
- Permit Requirements: Many electrical projects require permits and inspections to ensure they meet local building codes. Professional electricians are familiar with these requirements and can handle the necessary paperwork and compliance issues.
How to Communicate Effectively With an Electrician
- Describe the Problem Clearly: Provide a detailed description of the issue, including when it started, any troubleshooting steps you’ve taken, and the results of those efforts. The more information you can provide, the better prepared the electrician will be to address the problem.
- Be Specific About Symptoms: Mention any specific symptoms you’ve noticed, such as flickering lights, frequent breaker trips, or unusual noises. This can help the electrician diagnose the issue more quickly.
- Prioritize Issues: If you have multiple electrical problems, list them in order of priority. This helps ensure the most critical issues are addressed first.
- Ask Questions: Don’t hesitate to ask the electrician about their approach to the repair, estimated timelines, and any potential impact on your home’s electrical system. A reputable electrician will be willing to explain their process and provide reassurance.
Table: When to Call a Professional Electrician
| Situation | Reason for Professional Help |
| Persistent or Complex Issues | Requires expertise for diagnosis and repair |
| Major Installations or Upgrades | Involves complex wiring, permits, and inspections |
| Signs of Wiring Damage | Potential fire hazard and safety risk |
Knowing when to call a professional electrician and how to communicate effectively with them are key components of responsible homeownership. By entrusting complex or hazardous electrical work to the experts, you can ensure the safety, efficiency, and long-term reliability of your home’s electrical system.
Preventive Measures to Avoid Electrical Problems
Preventing electrical problems before they start is key to maintaining a safe and functional home. Routine maintenance and a proactive approach to electrical safety can significantly reduce the risk of issues arising, saving you time, money, and stress in the long run. Here are essential tips and preventive measures to help keep your home’s electrical system in top condition.
Routine Maintenance Tips for Your Home’s Electrical System
- Inspect Electrical Outlets and Switches: Regularly check outlets and switches for signs of wear, damage, or overheating. Ensure outlet covers are intact and that there are no exposed wiring or loose components.
- Test GFCI Outlets Monthly: Ground Fault Circuit Interrupter (GFCI) outlets are designed to protect against electric shock. Test these outlets monthly by pressing the “Test” button, ensuring they trip and reset correctly.
- Check Circuit Breakers: Familiarize yourself with your home’s breaker panel. Look for any signs of damage or wear and test the operation of circuit breakers to ensure they are functioning properly.
- Look for Warning Signs: Be alert to warning signs of electrical problems, such as flickering lights, buzzing sounds, or a burning smell. Addressing these signs early can prevent more serious issues.
How to Ensure Your Electrical System Remains Safe and Functional
- Avoid Overloading Outlets: Be mindful of the electrical load on outlets and circuits. Avoid using multiple high-wattage appliances on the same outlet or circuit to prevent overloads.
- Use Surge Protectors: Protect sensitive electronics with surge protectors, which can prevent damage from power surges caused by lightning strikes or other electrical issues.
- Keep Electrical Panels Accessible: Ensure easy access to your home’s electrical panel for quick shut-off in emergencies. Do not block the panel with furniture or other items.
- Schedule Professional Inspections: Consider having a licensed electrician conduct a thorough inspection of your home’s electrical system every few years, especially if your home is older or you’ve made significant renovations.
By implementing these preventive measures and routine maintenance tips, you can help ensure your home’s electrical system remains safe, functional, and efficient. Regular attention to your electrical system not only enhances safety but also contributes to the overall well-being of your home, providing peace of mind for you and your family.
Conclusion
Navigating the complexities of home electrical systems can be daunting, but with the right knowledge and approach, troubleshooting common electrical problems becomes a manageable and empowering task. This article has equipped you with essential insights into diagnosing and resolving frequent electrical issues, emphasizing the importance of safety, understanding when to tackle problems yourself, and recognizing when it’s time to call in the professionals.
Recap of Key Points Covered
- We began by understanding home electrical systems, highlighting the basic components and their functions to lay the groundwork for effective troubleshooting.
- Safety precautions were underscored as paramount before attempting any electrical work, with guidance on how to properly shut off power and use testing equipment to prevent accidents.
- The core section detailed troubleshooting common electrical problems, from flickering lights and dead outlets to frequent circuit breaker trips and buzzing sounds, offering practical steps for diagnosis and resolution.
- Advanced troubleshooting techniques introduced the use of multimeters and circuit tracing as methods for identifying more complex issues, for those ready to expand their DIY electrical skills.
- Recognizing when to call a professional electrician was discussed, stressing the importance of professional expertise for complex or hazardous situations and how to effectively communicate your electrical issues.
- Preventive measures to avoid electrical problems were shared, focusing on routine maintenance and proactive steps to ensure the safety and functionality of your home’s electrical system.
Encouragement for Homeowners
Armed with the knowledge from this guide, homeowners should feel more confident in their ability to address electrical problems within their homes. Remember, the key to successful electrical troubleshooting lies in a respect for the power and potential dangers of electricity, a methodical approach to diagnosing issues, and an awareness of your own limits. By taking the time to understand your home’s electrical system and adhering to safety protocols, you can tackle many common problems while keeping your home and loved ones safe.
Electrical troubleshooting can be a rewarding part of homeownership, offering the satisfaction of solving problems and maintaining your home. However, always prioritize safety and don’t hesitate to seek professional help when needed. With this balanced approach, you can navigate electrical issues with confidence, ensuring your home remains a safe, comfortable, and well-maintained environment.
FAQs
Can I do electrical work in my home without a license?
Answer: Homeowners can perform many basic electrical tasks without a license, such as replacing light fixtures, outlets, and switches. However, more complex work like adding circuits, major rewiring, or panel upgrades typically requires a licensed electrician due to safety concerns and local building codes.
Is it safe to use extension cords as a permanent solution?
Answer: Using extension cords as a permanent solution is not recommended. They are designed for temporary use and can pose a fire risk if overloaded or used for extended periods. For long-term needs, consider installing additional outlets.
How do I know if my electrical panel needs to be upgraded?
Answer: Signs that your electrical panel may need an upgrade include frequent breaker trips, the need for more circuit space, or if the panel is over 25 years old. An outdated panel can pose safety risks and may not meet your home’s electrical demands.
What should I do if my lights flicker?
Answer: Flickering lights can be caused by a variety of issues, from simple problems like loose bulbs to more complex issues like voltage fluctuations or faulty wiring. Start by checking and tightening the bulbs. If the problem persists, it may be necessary to investigate further or consult a professional.
Why do my breakers keep tripping?
Answer: Circuit breakers trip to protect your home from electrical overloads and short circuits. If a breaker trips frequently, it could be a sign of an overloaded circuit, a faulty appliance, or an electrical fault. Identifying and addressing the root cause is essential for safety and may require professional assistance.
How often should I check my home’s electrical system?
Answer: It’s a good practice to visually inspect your electrical system annually for any obvious signs of wear or damage. Additionally, having a licensed electrician perform a more thorough inspection every 3-5 years, or if you notice any issues, can help ensure your system remains safe and up to code.